Growing daylilies from seed is incredibly rewarding, and it’s rather easy to do! There are many different ideas on how to grow them if you search the Internet; what we will present here is the way we grow them here at Duluth Daylily. Our thought is that while there are many different approaches out there, it is probably best for the gardener who is new to starting daylily seeds to pick one method and stick with it, rather than trying to create a mish-mash of multiple protocols.
Where to Get Daylily Seeds
We’ll be brief because obtaining seeds isn’t really the point of this article series. You can:
- Buy them from us, right here on DuluthDaylily.com
- Buy them from our auctions on Daylily.com
- Buy them from other people’s offerings on Daylily.com and various specialty Facebook groups; these are generally good, safe bets.
- DON’T buy them from general seed companies or AMAZON sellers, and be very wary of the generic offerings on places like eBay or Etsy (we’ve listed seeds on sites like those, and our listings are very different from most of what’s found there).
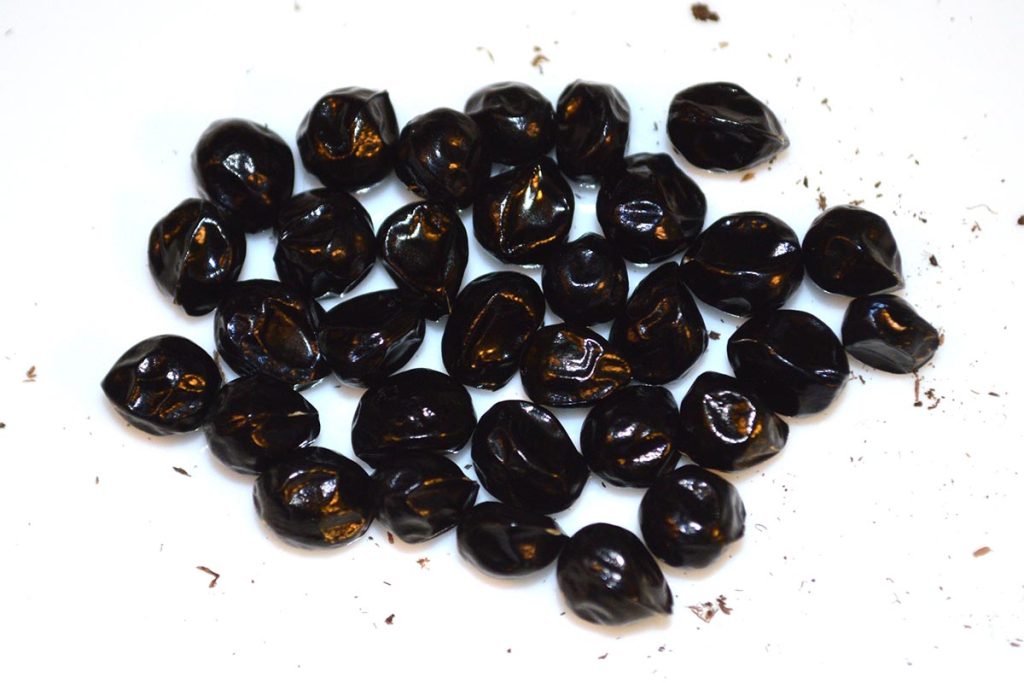
- Hybridize your own in your own gardens, then harvest and store them yourself for seed starting in the winter!
Good daylily seed is a labor-intensive process, which means good seeds are never “cheap”, and they come with lots of information, produced by trusted growers. We feel that $1 USD per seed is a realistic bare minimum retail price one should expect to pay, and most seeds sell for more than that.
Where To Start Seeds
There are hobby growers who start seeds in cups or pots on windowsills, or who set up a small area for a limited number of seedlings with a simple lamp to illuminate them. Many commercial-scale hybridizers start their seeds in greenhouses, while in mild climates others may simply start them in pots outdoors. Some growers even simply sow the seeds in the ground either fall or spring, and let nature do most of the work.
Here in Duluth, Minnesota, we grow daylily seedlings (and many other plants) in our basement under LED lights on racks that we have put together. These systems are space-efficient and affordable. The modular setup is easily replicated should you need to expand your growing area.
This system also affords a great deal of control and makes it easy to track results and conduct experiments. Most importantly, growing indoors extends our brief summer gardening hobby well into winter, and helps us ride out the long months until spring arrives! Our basement is heated to an ambient temperature of about 70F during the winter, making indoor growing an enjoyable experience.
We’ll outline how our growing racks are constructed here. Note, when we quote prices, they are as of February 2023, and do not consider tax or shipping charges you might incur.
We use these racks for a wide range of plants, not just daylilies, but also hosta seedlings and tropical vivarium and terrarium plants. The lighting outlined below is somewhat intense; if you were to use this for low-light plants, you can probably use single-tube LED-type lighting, reducing your energy cost and possibly your initial startup costs as well.
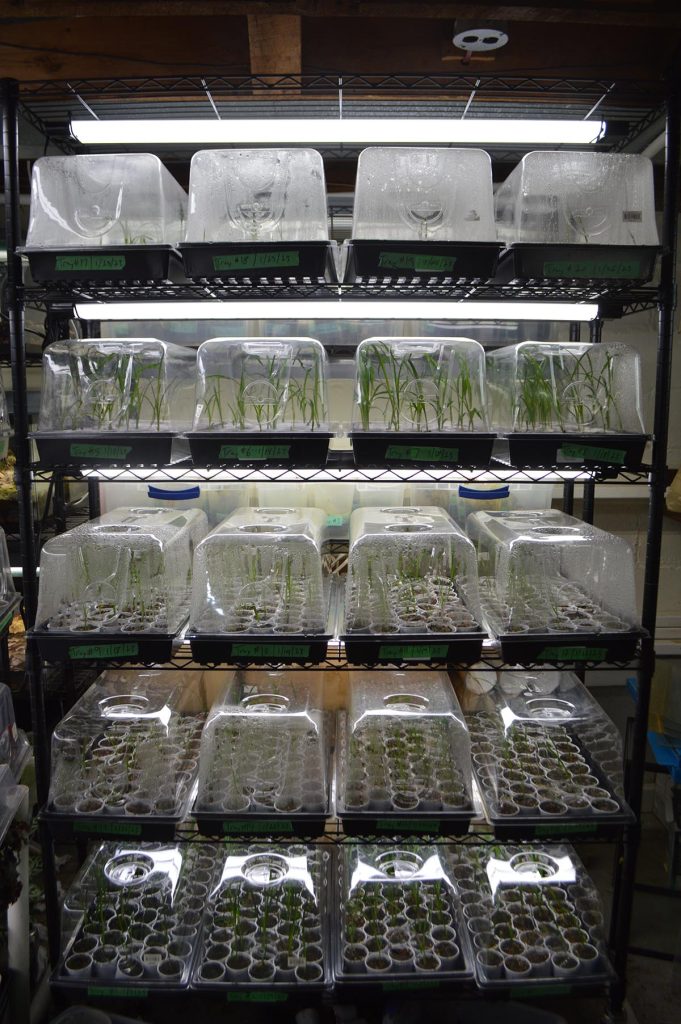
The Modular DYI Seed-Starting Plant-Growing Rack/Shelf System
Wire Shelving: Our growing racks are built with standard 48″ X 18″ X 72″ black wire baker’s rack shelving (e.g. $99.99 for this unit at Menards.com, or ). These standard shelving units come with four (4) shelves; you can purchase two more shelves to bring the total to six (6) shelves per rack (e.g. 2 X $21.99 for each extra shelf here on Menards.com). We utilize the heavy-duty wheels that are available for this shelving, which allow us to wheel the shelves around the basement if need be (e.g. $17.49 for these casters for wire shelving at Mendards.com).
Or, you can get the entire setup including all 6 shelves and the casters in one place if you shop around a bit (e.g. $105.99 + $24.99 shipping for this 6-shelf unit with wheels at AMAZON.com, compared to the raw $161.46 cost to assemble the comparable example on Menards.com).
LED Lighting: For lighting, we’ve utilized 48″ twin-tube LED shop lights. Our currently preferred type is this inexpensive option sold on AMAZON, currently called a Hykolity, which consumes 42 watts per four-foot light (see this 4-Pack for $54.99 here on AMAZON). We also use the 4-foot Hyper Tough LED 5000 Lumen Shop Lights from Walmart on other growing racks here (see it here for $19.97 at Walmart.com). Since we have several racks growing a wide range of plants, we’d go with the less expensive 4-packs, with the lights costing $13.75 each. If you have a few extras, well, you can replace one should it fail, or you can double-up for more intense lighting by using two on a shelf (We can’t say that four tubes work all that much better, but it does increase light intensity and spreads out the lighting more to the ends of the trays). While one can get really wrapped up in the particulars of color temperature or lighting spectrum, the results from these LEDs have always been sufficient in our opinion, so we see no reason to invest in more costly forms of lighting for these racks.
Light Mounting: For mounting the lights, we simply use black zip ties to hang them on the underside of the shelves, usually requiring two or three zip ties for each end of the light (e.g. a packet like this for $2.97 at Menards.com is probably enough for one or two racks). Center the lights front to back. Yes, the top shelf has no plants on it, but can be used for storage if there is room overhead; its main purpose is to support the uppermost light.
We also use a black 6-outlet power strip (like this one for $3.99 at Menards.com), mounted at eye level on one of the uprights (again, with some zip ties) so we can easily turn off all the lights at once (or run them all through a single heavy-duty timer). We use heavier-duty outdoor extension cords if we need them (to allow the racks to be moved around without unplugging them).
Rack Cost and Capacity: While these racks cost a little less when we built them in pre-Pandemic, pre-inflationary times, they are still quite reasonable in the grand scheme of things. If you buy the cheapest options wherever possible, you can probably get set up for around $215 plus tax (e.g. buying 1 4-pack of lights, and then getting one more of the more costly lights available singly).
A rack setup like this will hold twenty (20) standard 1020 nursery trays with 7-inch vented domes. Simply space put the bottom shelf at the lowest possible point. The next few shelves can have about 13″ from the top of the shelf to the bottom of the next one; the spacing on the last two shelves seems to work out to be 12″, remembering that the last shelf is placed in the absolute uppermost position.
Pest Monitoring
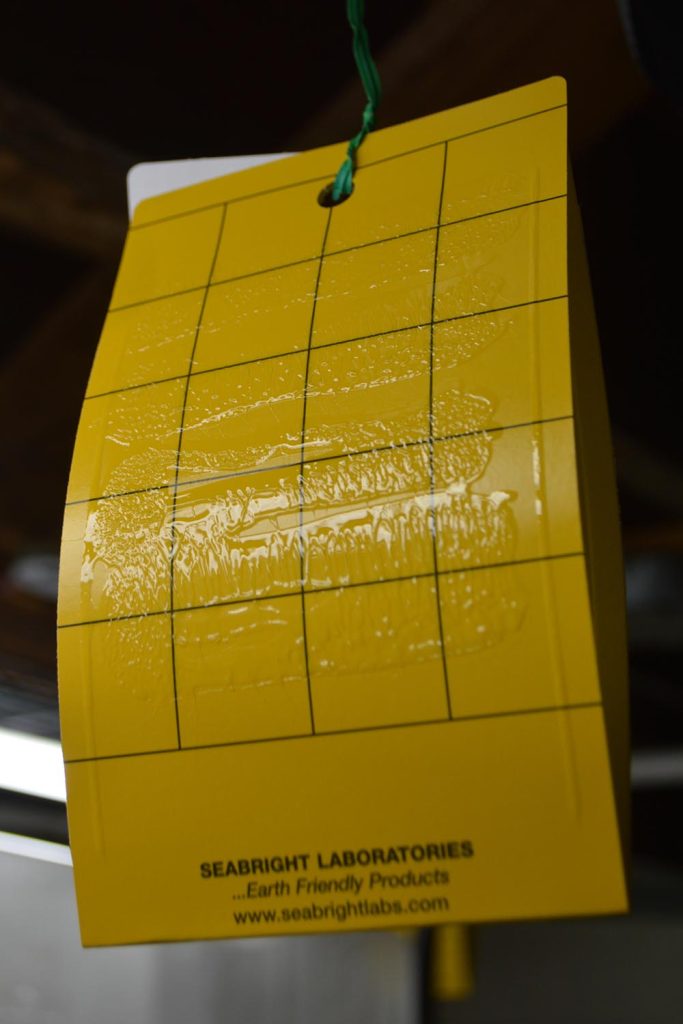
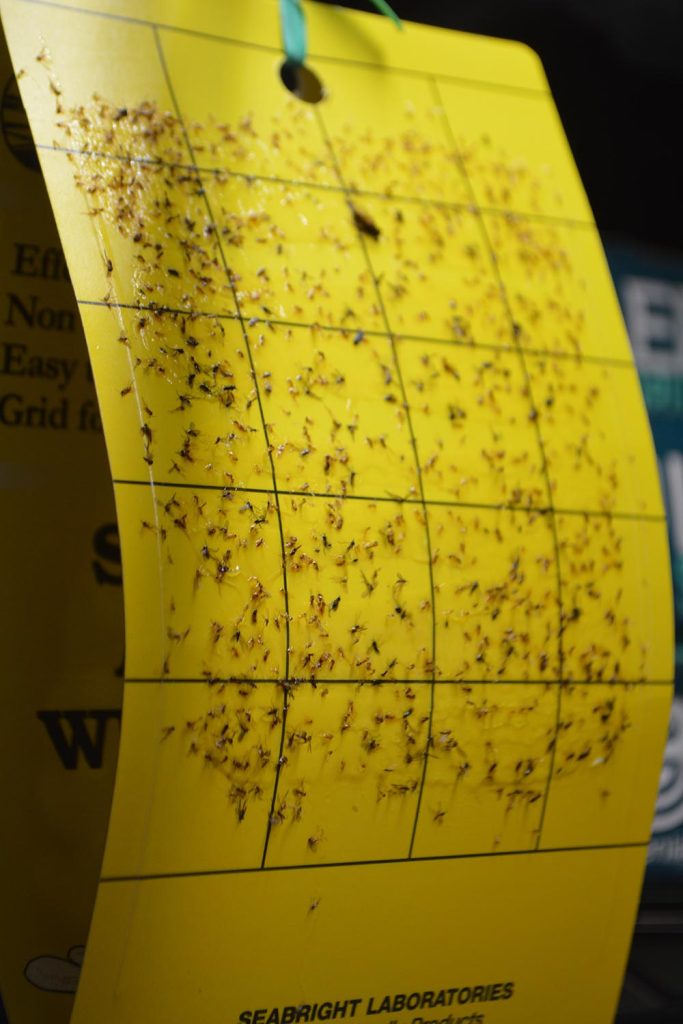
One of the most invaluable tools we have come across are yellow and blue sticky traps. We mention them here because you should place them around your growing area, and you should have them in place before you start planting seeds. They can be attached and hung from the shelves themselves, or simply placed in the vicinity.
A word of advice; don’t situate sticky traps where you’re liable to come in contact with them. The goo is VERY sticky and doesn’t easily clean up with dish soap. Goo Gone, however, works very well at cleaning the sticky substance off your hands, and your equipment.
These traps perform two roles. First, they physically trap pests, taking them out of the equation. But second and more important, is that they allow you to monitor for pests that might otherwise go unnoticed. The traps never really “go bad”, they remain sticky for years after you deploy them, so really it’s more about replacing them before they become too overloaded with dead insects!
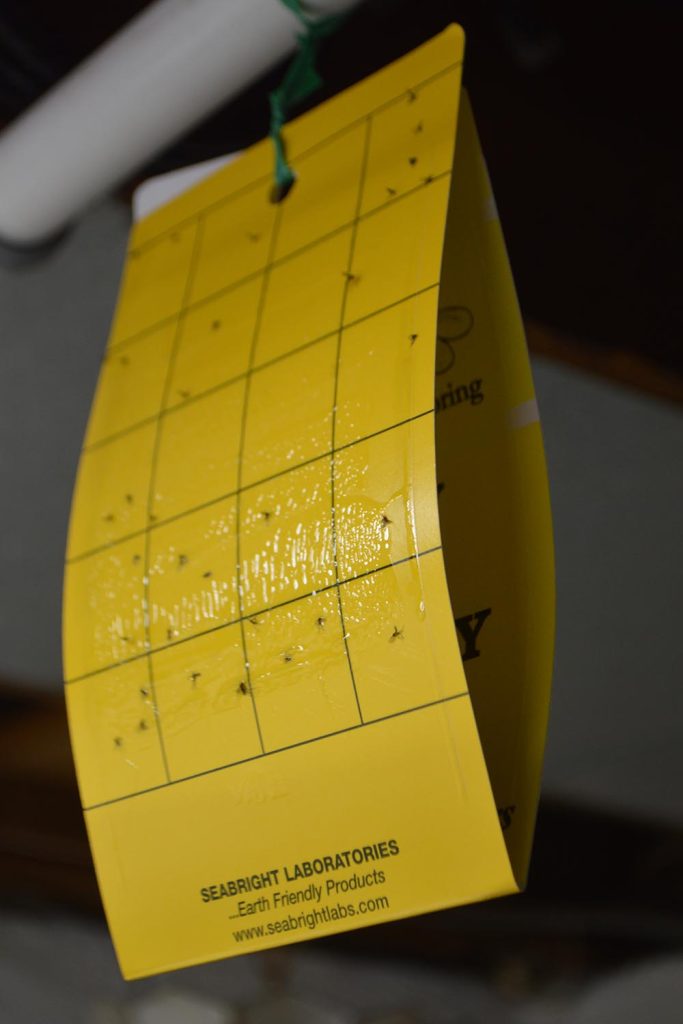
Deploying both the yellow and blue forms is ideal because different types of pests are attracted to the different colors. Thrips, for example, are much more likely to be trapped on the blue cards. We like the cards from Seabright Laboratories, and you can get a set (15 each color) for about $35 currently when you get them from AMAZON (15 pack of blue, and 15 pack of yellow, smaller quantities are usually available too). You will probably use one card of each type per year per rack. If you have heavy infestations with things like fungus gnats, you might change out the traps more frequently.
Potting Essentials
Given how we start seeds, each 1020 tray holds 45 2″ round cups, each receiving one seed. Thus, a potential maximum of 45 seedlings per tray, or 900 per 4-foot rack system.
Trays To Organize And Carry
Trays are easy. We use standard 1020 nursery trays without drainage holes, as we bottom water our seedlings. Often times these are simply purchased at our local Menard’s store. As of 2023, the shelf price per tray has risen to $1.99 each, but we’ve generally loaded up on them when they’re on sale, and we feel our cost has averaged closer to $1.49 each. So there is approximately $29.80 in tray costs per rack.
We like purchasing trays locally because we’ve found that some trays, even when new, have weak corners and may even leak. Leaking is counterproductive, so we like being able to examine each tray before we buy them. If you want to shop online, we have found GreenhouseMegastore.com to be reliable with good pricing. On their site, you’ll find not only standard trays but heavier-duty trays as well. If you’re buying standard trays in bulk and meet the shipping requirements, you can hypothetically get them for as little as $0.95 each (assuming you need 100 of ’em!) – you can see all the trays and tray accessories here.
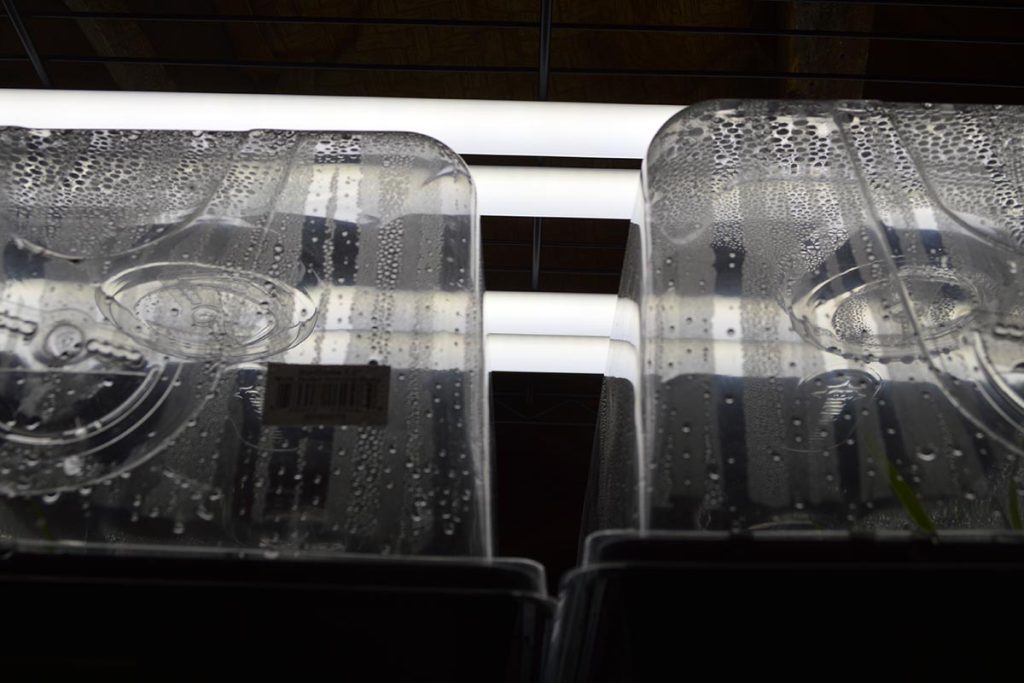
For 7″ vented humidity domes, we’ve had a few brands over the years and some haven’t held up. The ones from SunDome, with 4-way venting, are the ones we currently prefer and are what GreenhouseMegastore is currently selling. A pack of 10 currently costs $52.99 (as of spring 2023), and you’d need two of these to have domes for one rack. So that will set you back $105.98 per rack. If you buy these locally, it seems the retail price is closer to $7.50 each, so this is definitely one to buy in bulk online.
Now, we don’t really know whether you need 7″ domes or not. It is quite possible that adequate results could be had with the shorter, standard 2″ domes, simply allowing the seedlings to push open the lid and allow the seedlings to harden off, but it’s not as controlled of a process. We feel like the taller vented domes give me a longer window to provide uniform humidity, as well as making slower, intentional adjustments by opening individual vents. Maybe at some point we’ll have to do some side-by-side experiments with 2″ vs. 7″ domes to see if it really makes any consequential difference.
Cups for Pots
Obviously not every seed germinates, but we use individual cups so we can track each cross (aka. grex) and each seed, particularly if we’re running scientific experiments. Indeed, there are other options one can employ; you might be more comfortable starting seeds in a “community pot” where several seeds of the same cross are planted together in standard nursery pots.
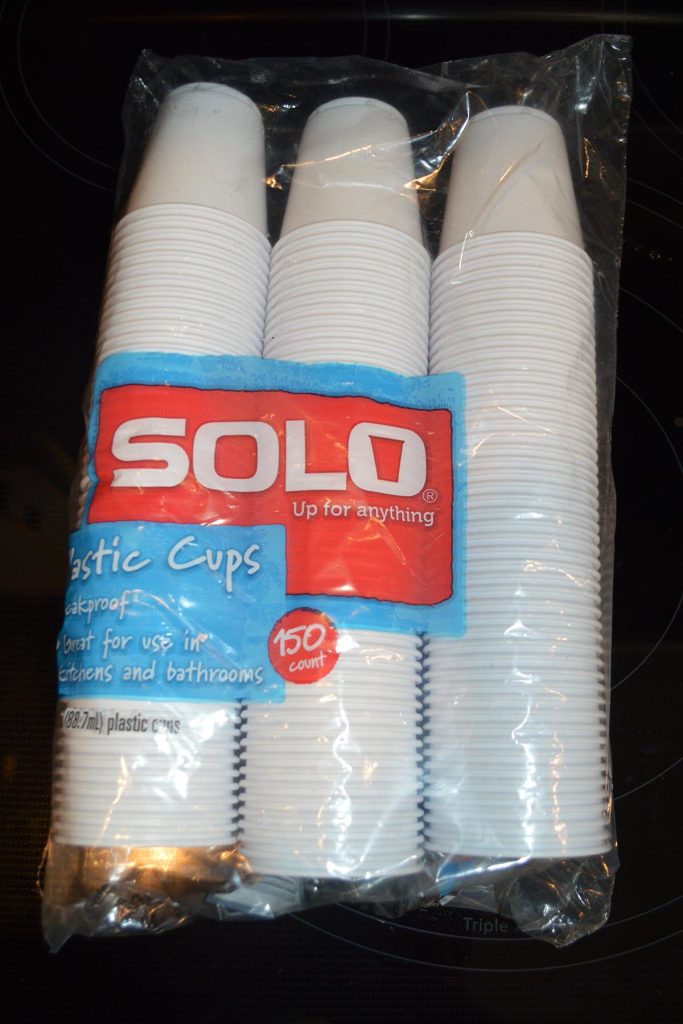
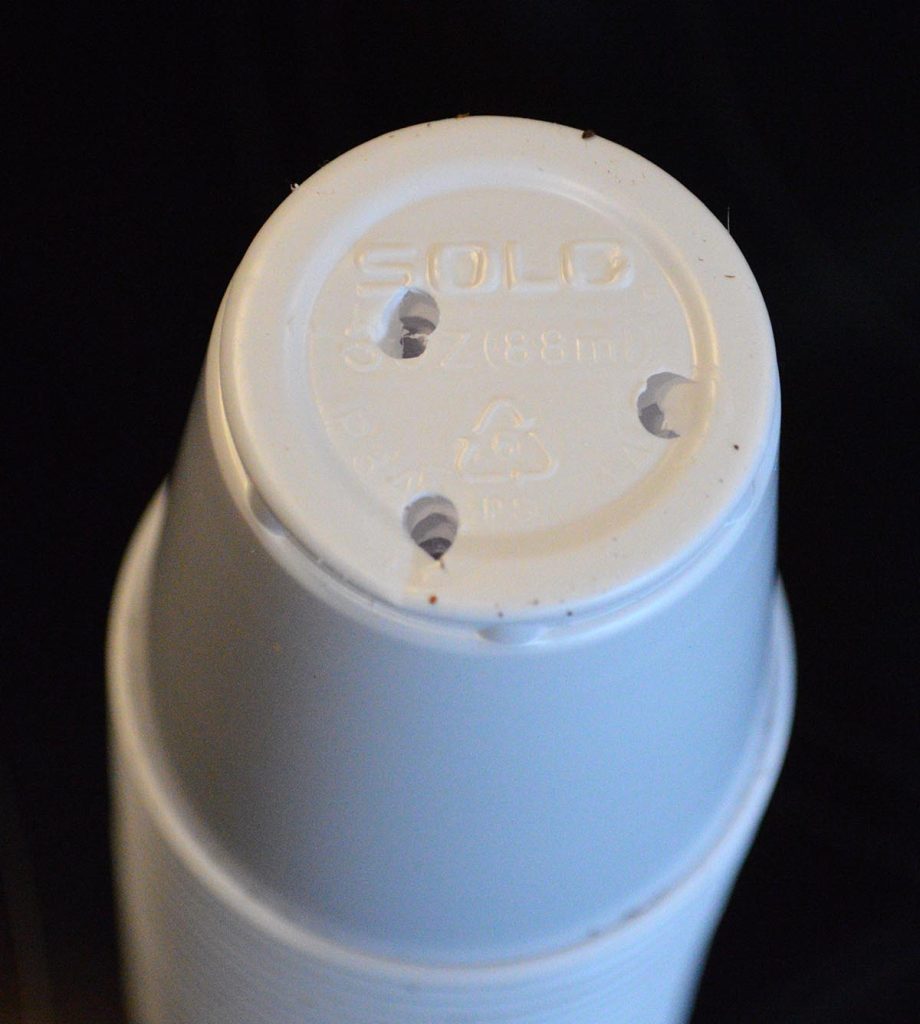
But we like our white, round, individual pots. We make them using standard 2″ white 3 oz. Solo bathroom cups. We simply take a stack and drill three 1/8″ holes in the bottom by hand, removing the drilled cups and working our way down the stack to the bottom. The work goes quickly.
For a long time, a package of 150 of these cups cost $2.99 at our local grocery store; each cup cost $0.02. As of 2023, the price jumped to $4.99-$5.49 for the same package, one of the larger increases we’ve seen in these inflationary times. So now our cups cost in the range of 3.33 cents to 3.67 cents (basically $0.03 to $0.04) each. Even on the high side, it still costs under $2 per tray to have 45 individual pots, one per seed. 6 bags of these cups is enough to fill all 20 trays on a rack system and costs just under $33. This is one of the rare items that appear to be significantly more expensive online, unless there is case pricing for these somewhere that we don’t know about!
To offer a comparison, if you were to use the standard 2.5″ deep square pot, you can fit 32 per tray. You would need 640 per rack system. Off the shelf, these types of pots can start at $0.20 each; the best price we know of right now is a case of 800 for $97.95 (plus tax and shipping) at GrowersSolution.com, which brings the pre-tax, pre-shipping cost per pot in at 12.25 cents each, basically $4 per tray. The upside is that these pots hold significantly more potting media, and could easily be used to start 3-5 seeds each initially. However, they are taller as well, which leaves less overhead height for leaves! If growing with these, we might omit one of the shelves, maybe even two, which overall means significantly fewer seedlings in the same square footage.
But the real kicker is that you have to find a way to label all those pots. Plastic labels are not cheap either! The white plastic bathroom cups happen to be extremely amenable to being written on with a standard black Sharpie; you can even splurge and use the Sharpie Extreme if you want added UV Fade Resistance. Ultimately we like the white plastic bathroom cups, and will probably continue to use them well into the future. Sadly we cannot recycle them here (they are #5), so we throw out a fair amount (and I, Matt, grit my teeth when doing so), but cleaning any pot is a lot of work, and we’re not so sure that the black pots would hold up more than a couple years anyway. We have simply found no better and more affordable solution to meet our needs and preferences at this time.
Our Seed Starting Mix
Our standard indoor growing mix has served us well for starting daylily seeds. We simply mix, by hand, a 2:1 ratio of standard all-purpose ProMix and coarse perlite.
ProMix is something we buy locally in large, compressed, 36lb. blocks at Menard’s. Prior to 2023, these cost $14.99 each, for a 2 cu. ft. compressed package. Imagine our surprise when the first one we bought in 2023 had risen to $19.99 (see on the Menards.com website). Still, this all goes a long way.
The coarse perlite is something we also source locally in truly massive bags. Don’t waste your time with small bags off the retailer’s shelves that cost $5-$7 each; one of these massive bags lasts a long time, and costs well under $30 (of course, we haven’t had to go buy one yet in 2023…so maybe we shouldn’t speak too soon!). A comparable 4 cu. ft. bag of coarse perlite is currently $41.99 at GreenhouseMegastore.com….hit that free shipping mark with some domes or trays and it might be worth it.
Overall, one bag of the Promix seems to be nearly enough for two racks worth of our 2″ cups, and the perlite obviously goes a much longer way. This mix seems to allow for ample drainage and aeration while also supporting strong growth, and it is probably just a couple of pennies per pot.
Continue in Part II
Now that you have all the materials in place, it’s time to grow some daylilies from seed!